BYOES: Part 2 - Reading Mail
Setting up an IMAP server using Dovecot on OpenBSD
This is a follow up to a previous article BYOES: Build Your Own Email Server on OpenBSD. I recommend reading that article first.
In this article I'll be setting up an IMAP server using Dovecot. IMAP is a protocol that allows a users device to communicate with, read and manage mail messages. Like the previous article, this article is intended for those admins that are comfortable with editing files, updating DNS records and installing software on servers. And this article is not a substitute for reading the official manuals and documentation.
Aside: There are actually two protocols used to retrieve email from servers: IMAP and POP. Both protocols do roughly the same thing. By default POP will remove the mail from the server (though there are ways to tell it to leave it on the server). This is fine, except when you want to view your mail from several different devices such as your phone, laptop, etc. This is the reason that IMAP is usually the preferred protocol used for mail retrieval.
Step 1: Install and configure software
First we will install the IMAP software Dovecot. We will also install Pigeonhole. Pigeonhole software is a sieve implementation will allow us to create "rules" to auto-sort messages when they are received. Finally we will install opensmtpd-extras package that will provide the ability to read passwd files for our user accounts.
pkg_add dovecot dovecot-pigeonhole opensmtpd-extrasNext, we will create a new user and group for handling the local file access. We will use the user and group of vmail. Since we do not specify a password, the account is prevented from being used to actually login.
useradd -g =uid -s /sbin/nologin -m -d /var/mail/vmail -u 2000 vmailNow configure Dovecot. Dovecot first reads the /etc/dovecot/dovecot.conf file. That file will then call some include files in the /etc/dovecot/conf.d/ directory and finally, if it exists, the /etc/dovecot/local.conf file. The local.conf file is where we will place our configuration. We will start by moving some files in the /etc/dovecot/conf.d/ directory that will get in our way.
mv /etc/dovecot/conf.d/10-ssl.conf /etc/dovecot/conf.d/10-ssl.conf.orig
mv /etc/dovecot/conf.d/10-auth.conf /etc/dovecot/conf.d/10-auth.conf.orig
# enable ssl
ssl = yes
ssl_cert = < /etc/ssl/byoes.example.org.fullchain.pem
ssl_key = < /etc/ssl/private/byoes.example.org.key
ssl_min_protocol = TLSv1.2
# setup authentication
#auth_mechanisms = plain
disable_plaintext_auth = yes
passdb {
driver = passwd-file
args = scheme=CRYPT username_format=%n /etc/mail/passwd
}
userdb {
driver = passwd-file
args = username_format=%n /etc/mail/passwd
# override any user info that might be in the passwd file.
override_fields = uid=vmail gid=vmail home=/var/mail/vmail/example.org/%n mail=maildir:~/Maildir
}
# enable the protocols to use
protocols = imap lmtp sieve
# set the default mail location
mail_location = maildir:~/Maildir
# enable mail plugins
mail_plugins = $mail_plugins notify
# setup auth listener
service auth {
unix_listener auth-userdb {
mode = 0660
user = vmail
group = vmail
}
}
# change the authworker to run as non-root
service auth-worker {
user = $default_internal_user
}
# setup metrics
metric auth_success {
filter = event=auth_request_finished AND success=yes
}
metric auth_failures {
filter = event=auth_request_finished AND NOT success=yes
}
metric imap_command {
filter = event=imap_command_finished
group_by = cmd_name tagged_reply_state
}
metric smtp_command {
filter = event=smtp_server_command_finished
group_by = cmd_name status_code duration:exponential:1:5:10
}
metric mail_delivery {
filter = event=mail_delivery_finsihed
group_by = duration:exponential:1:5:10
}
# enable IMAP protocol
protocol imap {
mail_plugins = $mail_plugins imap_sieve
}
# setup local delivery options
quota_full_tempfail = yes
protocol lda {
mail_plugins = $mail_plugins sieve
}
# setup some common mailboxes that are used by different clients to consistent destinations
namespace inbox {
mailbox Spam {
special_use = \Junk
}
mailbox "Deleted Items" {
special_use = \Trash
}
}
# setup local delivery protocol
protocol lmtp {
mail_plugins = $mail_plugins sieve
}
# disable verify quota befor replying rcpt to
lmtp_rcpt_check_quota = no
# setup stats service
service stats {
unix_listener stats-writer {
user =
group = $default_internal_group
mode = 0660
}
}
# setup sieve plugin options
# enable if there needs to be default sieve processing
#plugin {
# sieve_pipe_bin_dir = /usr/local/lib/dovecot/sieve
# sieve_before = /etc/dovecot/sieve/default.sieve
# sieve_global_extensions = +vnd.dovecot.pipe +vnd.dovecot.environment
# sieve_plugins = sieve_imapsieve sieve_extprograms
#}
To confirm that the configuration is good run the doveconf(1) command. This will output the entire dovecot configuration and any errors with the configuration.
doveconfIf no errors are displayed then enable dovecot.
rcctl enable dovecotWe will start dovecot a little later.
Step 2: Update previous smtpd(8) environment
In the previous article we used the user accounts on the host as the mail accounts. We will convert those accounts to virtual accounts. The first step is to create a user file. This file will be referenced by both smtpd(8) and dovecot. In this example we will place the file in /etc/mail/accounts.
The format is very similar to an actual passwd(5) format (but not exactly the same). Format is
username:password:uid:gid:description:homedir:shellThe username will be our virtual user, 'bob' in this example. Since we will be using a virtual mail user account, the uid and gid will match the virtual mail user, 2000 in this case. The shell will also be the same as the vmail user '/sbin/nologin', thought it is not used by anything. The home directory will be source in the same directory as the vmail user, but will add the domain and username of our account. In this example /var/mail/vmail/example.org/bob. The description can be anything we want. The last but not least is the password field. This is the standard hashed password. It can be copied from the password file, or created using the smtpctl(8) command.
# smtpctl encrypt letmein
$2b$10$tH04rqfxukRd.UuFeXPhyeOuFQBu9Zw9JK5M5Zm6yzYckHTTrWSa6
Putting it all together we would get
[email protected]:$2b$10$tH04rqfxukRd.UuFeXPhyeOuFQBu9Zw9JK5M5Zm6yzYckHTTrWSa6:2000:2000:Bob Example:/var/mail/vmail/example.org/bob:/sbin/nologinNow only dovecot and smtpd(8) should be able to read this file. To make sure that both daemons can read this file when they are running under their respective service accounts we will set the owner and group of the file accordingly.
chmod 640 accounts
chown _smtpd:_dovecot accountsNow we will tell smtpd(8) it should use this accounts file as its user file. First thing we will do is create a new table called 'users' that is associated with this file. Next, in our submission and smtps listen commands we will specify the auth table to use.
table users passwd:/etc/mail/accounts

listen on all port submission tls-require pki mail_cert auth <users> filter dkimsign_rsa
listen on all port smtps tls-require pki mail_cert auth <users> filter dkimsign_rsa
We need to replace the "local_mail" action. This update will use Dovecot to deliver the mail to the users mailbox according to the configuration in Dovecot.
action "local_mail" lmtp "/var/dovecot/lmtp" userbase <users>Also to send mail from any host other than the local host we need to adjust the outbound match rule to the following.
match from any for any action "outbound"Now with all of that complete, we can restart smtpd(8) and start Dovecot
rcctl restart smtpd
rcctl start dovecotStep 3: Announce it to the world
Ok, so we now have an IMAP server and an SMTP server. Not very useful if you cannot read and send mail. For this we will need an mail client. (You may even hear/read the term Mail User Agent MUA) This can be software like Outlook, Mozilla Thunderbird or even the mail software on your phone. Within the software you can create a new user and type all the server information into the application. Doing this once is fine. Ten times, tedious. To make our lives easier we will setup some DNS SRV records to help us. RFC 8314 and RFC 8997 specify some helper SRV records that most MUA software will use to 'automagically' configure the server settings when we just enter our email address.
_imap._tcp.example.org.  600  IN SRV  0 0 0 .
_pop3._tcp.example.org.  600  IN SRV  0 0 0 .
_pop3s._tcp.example.org. 600  IN SRV  0 0 0 .
_imaps._tcp.example.org. 600  IN SRV  0 1 993 imap.example.org.
_submission._tcp.example.org 600 IN SRV 0 1 465 smtp.example.org.
_submission._tcp.example.org 600 IN SRV 5 1 587 smtp.example.org.

imap.example.org.  600 IN CNAME byoes.example.org.
smtp.example.org.  600 IN CNAME byoes.example.org.
mail.example.org. 600 IN CNAME byoes.example.org.Since we do not want any non-encrypted or POP3 connections, we will specify the _imap, _pop3, and _pop3s records with no preference and specify a period (.) resolution which indicated not to use them.
For the _imaps and _submission records we tell the software to use the imap.example.org and smtp.example.org servers. Then we set the imap and smtp records to alias our mail server. We do this to help software that will "guess" imap.<domain> and smtp.<domain> servers for reading and sending mail.
Now with records added and updated in DNS, we can configure our mail client.
Setup Thunderbird Example
If this is the first time you've run thunderbird then the Account Setup dialog will pop up. Otherwise you'll need to add a new account. Either way it should look similar to this.
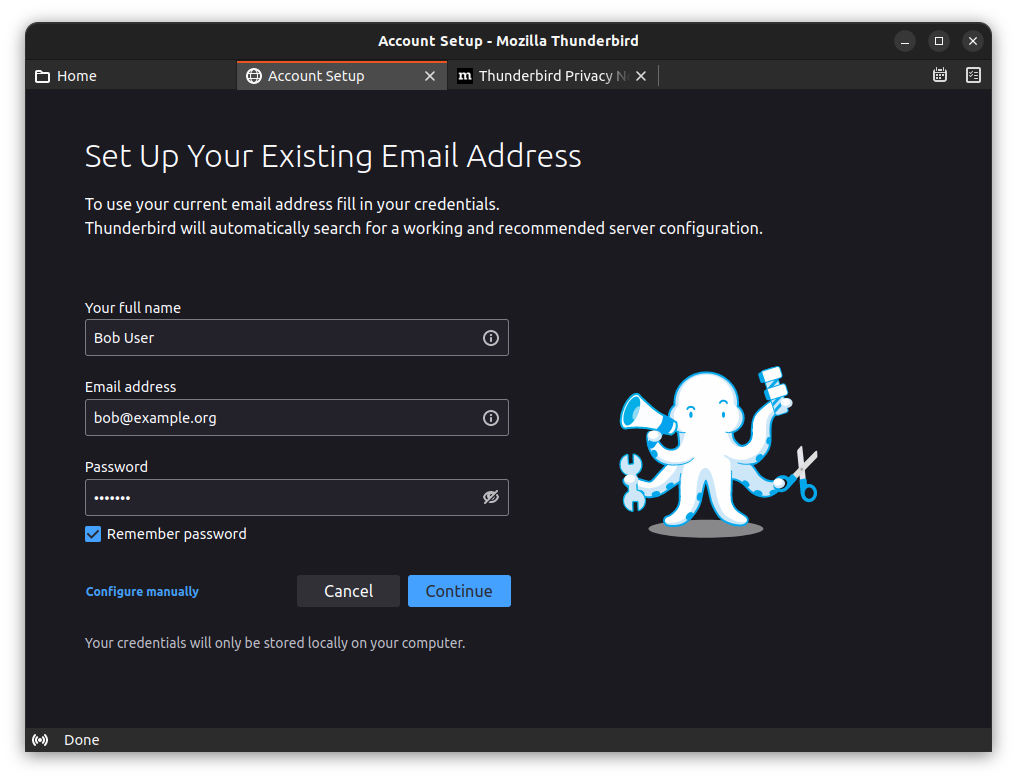
Enter your email address and password and click 'Continue'.

Behind the scenes, Thunderbird did a whole bunch of DNS queries. Since we setup the SRV and CNAME records it was able to guess the correct IMAP and SMTP servers. Also note, that both connection will be encrypted with STARTTLS.
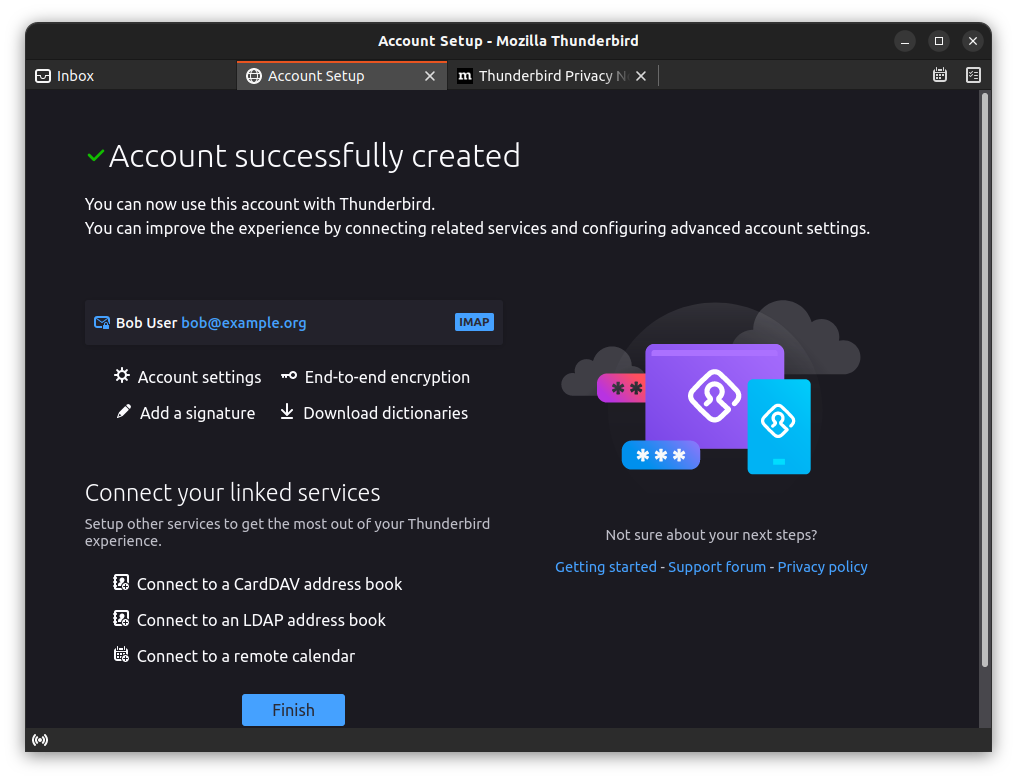
Success, the new account is setup ready to send and receive mail. Here are some examples below.
Step 4: Rules to wrangle an out of control mail box
If it hasn't happened yet, it will some day. Your mail Inbox will get too busy to handle. In this case we will use the pidgeon plugin for Dovecot that we installed in Step 1.
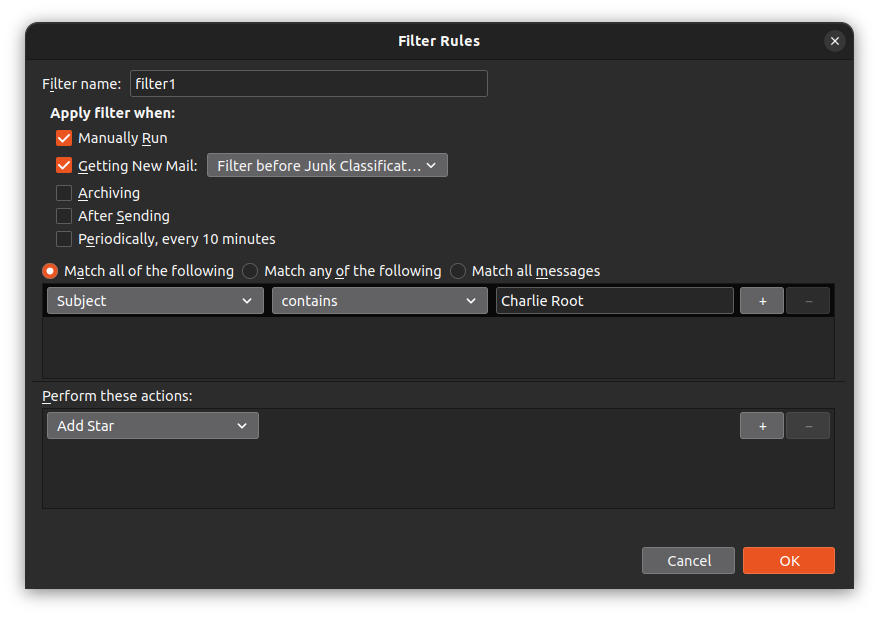
Message Filter rule example

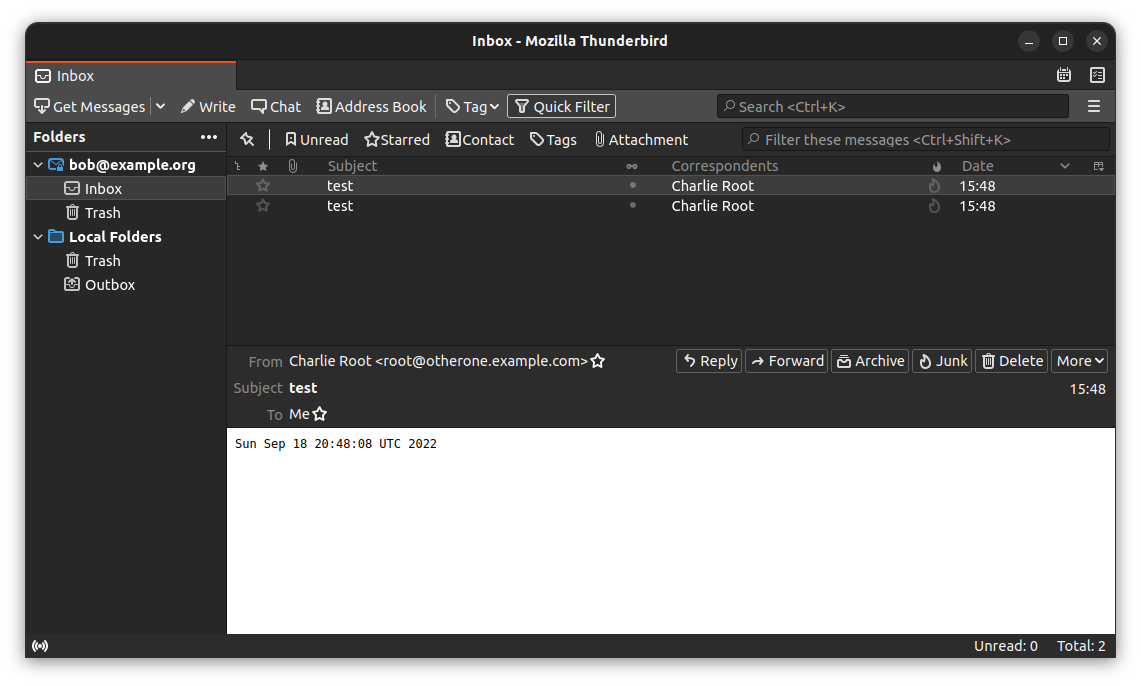
Here we give the filter a name 'filter1' and match on any subject that contains 'Charlie Root'. When it matches we star the mail so it pops out in our Inbox.
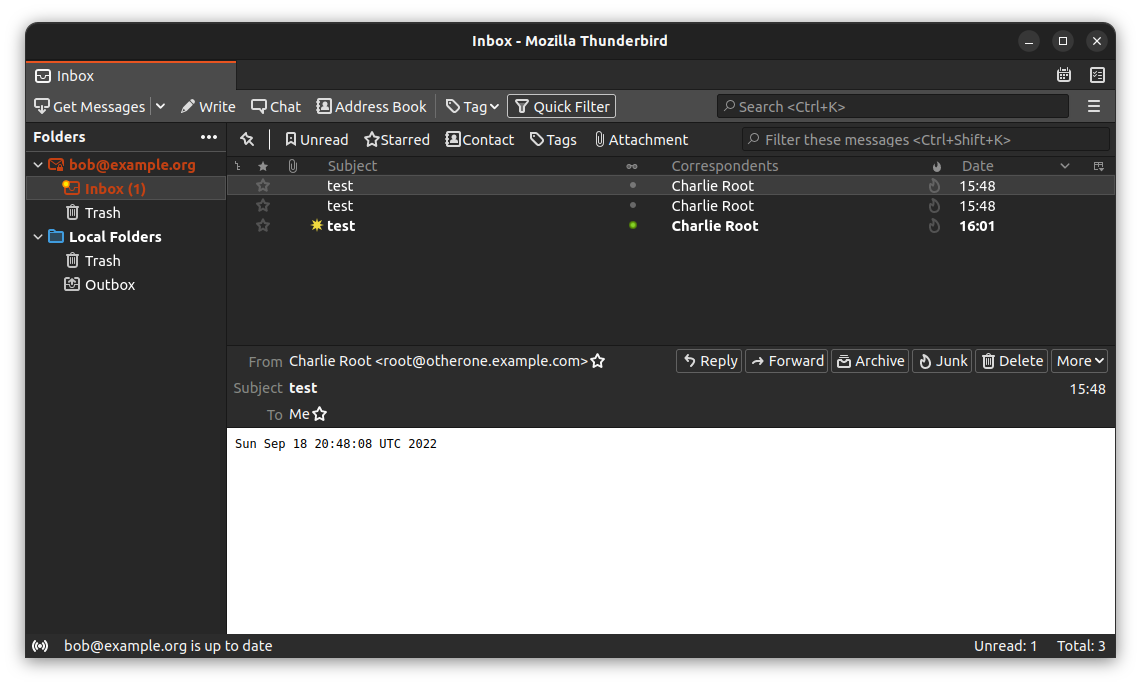
New message is now stared when it was received.
Troubleshooting
The easiest way to see what is going on is to tail the /var/log/maillog file.
tail -f /var/log/maillogIf that isn't sufficient to smtpd(8) can be run in debug mode with trace commands.
rcctl stop smtpd
smtpd -dvvv -T lookup -T rules -T smtp
Conclusion
This should be enough to get a single domain up an running and being able to send and receive mail from normal devices.
Let me know if I missed anything or if there is anything I explain more clearly.